Category: Beauty

  • Attended Barre3 Community Class at The Spa Wellness (Trinoma, Quezon City)

    Attended Barre3 Community Class at The Spa Wellness (Trinoma, Quezon City)

    I signed up for a class at Barre3, Trinoma without knowing anything prior other than that I have to bring a small towel, water bottle, extra clothes and non-slip socks (optional) and that I should not have a medical condition. Also, I had this tiny bit of overview on Barre3 which I read from its website:

    “Barre3 evolves the dancer’s workout by combining the grace of the ballet barre with the wisdom of yoga and the strength of Pilates. Barre3 classes are set to an upbeat soundtrack and follow a vigorous pace moving through a sequence of postures designed to shape and lift the entire body.”

    As you know (or not), as much as I’m all about food, I’m all about fitness, too! Barre3 is new to me, so I’m more than willing and excited to try it. Pushing yourself out of your comfort zone is hard but is necessary.

    In this post, I will be sharing what I learned from attending the Barre3 community class for the first time. Also, I will listing a set of reminders on how to prepare before attending one (just in case you’re interested to join in).

    What to Do in Preparation for a Barre3 Class

    1. Wear the Right Clothes

    Upon knowing that Barre3 is a combination of Pilates, yoga and ballet, my initial thought for the appropriate attire consisted of: yoga pants, sweatshirt, sports shirt and anything comfortable. High-five if you’re thinking the same. We’re right.

    When attending a barre3 class, wearing shorts is not recommended because you will be sitting and lying down on the floor about half of the time. You don’t want your skin to be injured by friction or get really dirty afterwards. Also,  this is not the time to be wearing a ballerina’s tulle skirt.

    2. Wear Non-slip Socks or Go Barefoot

    Non-slip socks are those with grips on the bottom and have good traction. Wear these (and not thin socks or regular socks). In my case, since I don’t own a pair of non-slip socks and did not consider buying one for the sake of this class, I just went barefoot which is fine.

    3. Eat a Complete Meal

    You don’t want to feel your stomach growling because of hunger as you can’t concentrate on the barre3 workout exercises. You also don’t want to fall ill because of lack of energy. Hence, eating a complete meal is ideal to make sure that you have something substantial in your stomach at least an hour before the class.

    4. Come on Time (or Earlier to Perform Pre-warm-up Exercises)

    In any session, event or activity, coming late is a no-no, in my book. Showing up on time (or early) is a sign of professionalism and responsibility. Plus, if you’re early, you can have more time to prepare yourself by doing pre-warm-up exercises before the actual warm-up exercises. Trust me, you’ll need them.

    5. Have the Proper Mindset

    It’s good to be prepared both physically and mentally. Know that you signed up for this class not to play around, meet faces and pass time. In addition, having negative thoughts such as “I can’t do it” or “This is too hard” will not do anything beneficial for the exercise. I remember one of my friends say, “It’s all mental” 😆 and he’s right! Expect to feel body pain but accomplish your goal of finishing the class. In other terms, don’t think of giving up.

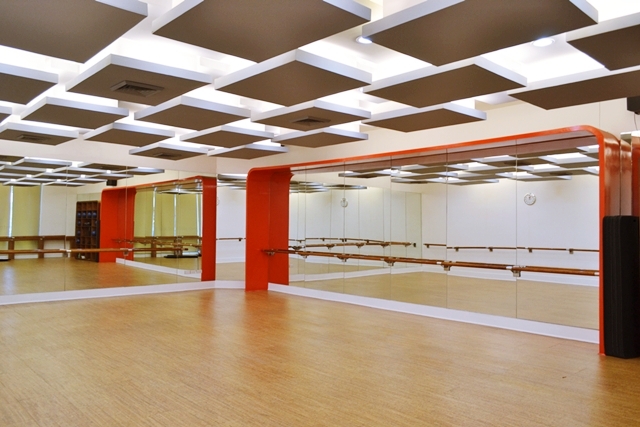
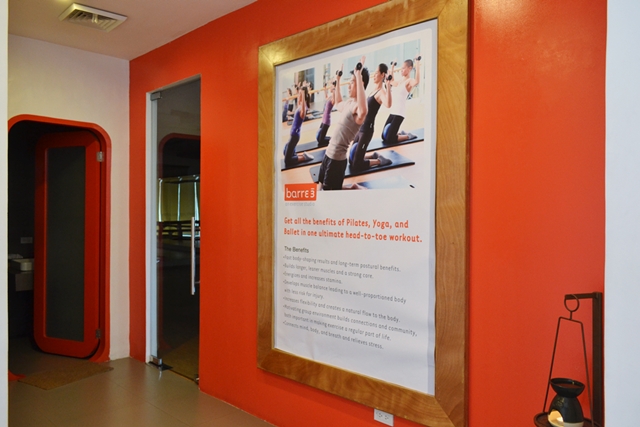
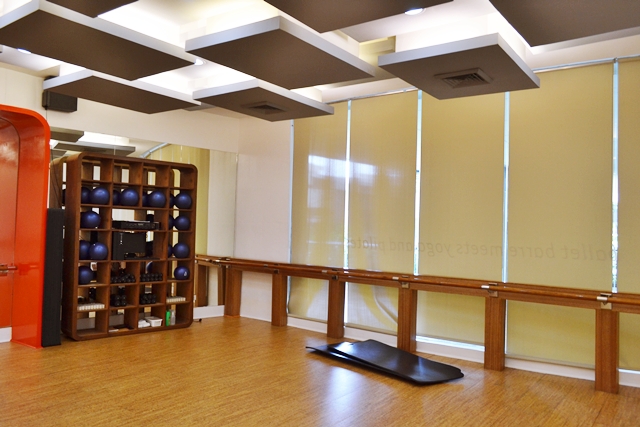
    Lessons Learned from Attending a Barre3 Community Class at The Spa Wellness (Trinoma, Quezon City)

    1. Barre3 is Not Easy

    Sure, I perform workouts regularly. However, this does not mean that I am not challenged by the exercises in this Barre3 community class. The steps were not all comfortable and familiar. Not one person in the class had been able to perform every single exercise perfectly. In the same vein, not one person in the class was discouraged either. The class had a supportive environment. Everyone worked at her own level, and the instructor was helpful.

    2. Persistence is Key

    Yup, I felt my thighs shaking. I breathed heavily with the tiny beads of perspiration forming on my back and forehead. Despite that, eyes closed, I thought and smiled to myself: I’m hooked. I may not be the best one in the class but definitely I may be one of the most persistent. When the instructor says last four counts or last 30 seconds, PUSH was all I did.

    3. Don’t Compare

    Comparing yourself against others will do no good in barre3. It’s better to keep track of your own progress so you remain focused. Don’t see the flaws of others; see yours. Have faith; your mental fortitude is half of the battle.

    This is the ends of my post. Hope you enjoyed reading! Now, tell me – have you tried attending a barre3 class before? Did you love it or hate it? Tips are much welcome! To find out more about Barre3 Philippines, check their FAQ page here.

    Barre3 Studio Philippines (inside The Spa Wellness)
    3rd Floor, Wellness Zone, TriNoma Mall, North Ave., Quezon City, Philippines
    For inquiries, contact 9008809

  • Review of Biokos Eye Shield Treatment and Intensive Brightening Creams

    Review of Biokos Eye Shield Treatment and Intensive Brightening Creams

    Most people are guilty (or unashamed) of “retouching” their profile photos to achieve pore-less and sparkling skin. Removal of eye bags, whitening of the face, removal of dark circles and applying bronzer to the face and nose are some of the popular edits that we are all well aware of. The same is being done with photographs we pine over magazine covers, brochures, editorials and ad pages, especially those promoting fashion and beauty.

    I don’t know if these tricks and tweaks are necessary when we become users of really great products in the market that promise to deliver grand results. Can frequent or regular use of these “seemingly magical” products be the key in eliminating the practice of airbrushing or photo-editing? Probably, yes? Or slightly?

    There’s nobody I know so far who can prove a positive answer. Despite not having any proof, I still make it a point to keep my skin hydrated and protected. Seeing real life coming back at us in the form of premature wrinkles, post–high school zits, surprise flab, blemishes and other imperfections made me a bit of a maniac about taking good care of my skin. Let me share with you how much I appreciate Biokos products.

    Review of Biokos Eye Shield Treatment and Intensive Brightening Creams

    I have been applying the Biokos eye shield treatment on my under-eyes and above the lash line nightly since the day I met Professional Artist Cosmetics (PAC). Like PAC, Biokos is an Indonesian line / brand by Martha Tilaar. The Biokos eye shield treatment with bio-aloe vera extract boasts a patented formula that combines the anti-aging properties of Immortelle flowers with plant-derived active ingredients that help fight signs of aging.

    Biokos offers a complete skin care treatment for the age 20s (Pure Balance: with bio-hazel extract for oily skin), 30s (Vital Nutrition: with bio aloe vera extract for dry skin) and 40s (Age Repair: with bio-seaweed extract). The store staff recommended me to get the one for 30s although I’m only 24, when I told her that I have normal skin (not too oily and not too dry). I thought, whatever lor, I just wanted to try it to see if my eye bags and dark under-eyes will disappear.

    It has been a month now, and the eye bags (for once were a source of low self-esteem) are now flat and gone, and so were the puffiness and dark under-eyes. Well, surprise surprise! 😛

    Another good thing is that I just consumed a super tiny bit of the cream so I think that this product can last for the next three months. How do I apply the Biokos eye shield treatment? As advised, I pat it evenly and gently around the eye contour area until it gets absorbed by the skin. The brand rep said that it can also be applied before putting on foundation / primer of make-up in the morning.

    Along with the Biokos eye shield treatment, I have also started to use Biokos Derma Bright Intensive Brightening Day Cream SPF 25 and Intensive Brightening Night Cream — both of which also slow down the appearance of aging. Application area includes the face, bottom-up, to the neck towards the jaws. The consistency of the creams is rich and smooth, watery and not sticky. It does not leave a greasy feeling or make the skin look shiny.

    Wrap Up

    It’s not every day that beauty products excite me in such a way that I feel possessed to tell everyone about it. That’s precisely what’s happening now. I love Biokos products because aside from the fact that they are effective (in my case), all ingredients are organic. They are plant-based (not obtained from chemicals), dermatologically safe (not tested on animals) and they smell great and go on lightweight!

    I use Biokos not to attain “computer-generated perfection” because it’s not “Photoshop in can” that I have here — but to feel excited about the thought of waking each day knowing that I’m doing my part in taking care of my skin without feeling guilty. 😀

    To know more, you can check out Biokos website or visit the Biokos Philippines Facebook Page and Bioko Philippines Twitter Account.

  • Review of NOVUHAIR 3-in-1 Pack: Nature’s Answer to Hair Loss

    Review of NOVUHAIR 3-in-1 Pack: Nature’s Answer to Hair Loss

    Sometime in mid-September 2013, I officially accepted a mission. It was a mission to test out the Novuhair 3-in-1 Pack which is composed of the Novuhair Topical Scalp Lotion, Novuhair Herbal Shampoo and Novuhair Herbal Conditioner and see if I can vouch for these products for what they are known.

    I thought that my dad (who’s now nearing 60 years old) rather than myself would be a better candidate to check what Novuhair has to offer. I told him to try Novuhair and use the trio every day. It has been a month now since he took on a “healthy hair journey.” So, did Novuhair products work for him? You asked. I’m answering.

    Novuhair: At Closer Inspection

    Introduced by prominent salon and hair expert Fanny Serrano in the Philippines, the Novuhair brand rejuvenates hair follicles and improves blood circulation to the scalp to stimulate hair growth. It also eliminates dandruff, detoxifies scalp and improves scaling. Overall, Novuhair provides optimum nutrition to combat hair loss and hair thinning.

    Call me outdated but I was really not familiar with the brand before and was just surprised that my mom is aware about the wonders of Novuhair. She recounts how Fanny Serrano shares his positive testimonies on the products. He started to feel insecure for having bald spots at age 40. Truth be told, baldness is also something that most people will experience in their lifetime. Thanks to Novuhair products, Fanny Serrano’s spots were covered up and he got his hair back growing again eventually with no side effects experienced. Magic?

    Nope.

    But pretty close.

    Active Natural Ingredients

    Novuhair boasts of natural herbs, essential oils and co-factor nutrients used for centuries, proven safe and effective in treating hair problems. It is composed with active natural ingredients, and among nine of which are as follows:

    1. Moringaoleifera / Malunggay / Moringa – helps restore the skin’s condition and prevent falling hair
    2. Sweet Almond Oil / Prunusamygdalus – moisture-rich oil that contains vitamins A, B1, B6 and E, as well as minerals such as magnesium and iron that easily penetrates the hair shaft and follicles, relieving hair dryness and itching and providing nourishment to the hair to promote hair growth
    3. Peppermint – slows down the growth of bacteria and fungi, aside from giving a relaxing effect on the muscles
    4. Panax Ginseng – improves blood circulation to the scalp
    5. Ginger – acts as hair bulb nutrient and stimulant
    6. Aloe Barbadensis – effective agent for hair growth and the prevention of falling hair
    7. Lavender – helps relieve itching
    8. Rosemary – contains properties that help combat dandruff and disinfects the scalp
    9. Lemongrass – controls sebum flow and helps to clean the scalp’s pores and prevent dandruff

    As you may have noticed thus far, Novuhair products do not contain harmful chemicals that usually are the culprit to premature balding aside from aging. Natural products are safe to use as they treat hair without killing hair follicles.

    Review of Novuhair 3-in-1 Pack (as told by Daddy)

    My dad’s hair always looked flat, thin and very oily. After the “Novuhair treatment,” he was amazed as his hair appeared and felt significantly thicker and fuller now. His hair became soft but not without the conditioner. He especially likes that the three products together add shine, add volume, clean thoroughly and lather well. The herbal shampoo does not have the thicker consistency that a lot of people expect in a shampoo, but it works.

    The only con is that it has this slight but not offensive smell. However, just the fact that is doesn’t smell like jasmine and roses doesn’t mean that it doesn’t do the very specialized job for which it is intended.

    Results were not visible from the first two weeks of application. That’s why it pays to be patient — use the products religiously to maximize the effects.

    How to Use Novuhair

    Novuhair Herbal Shampoo and Conditioner are used during bathing. Simply massage a generous amount of the lotion onto wet scalp for five to ten minutes using fingers (not finger nails). Rinse off and towel dry. Then apply the Novuhair Topical Scalp lotion and leave it on as a hair-styling agent. Because of its peppermint content, your scalp will feel cool and soothing. With consistent daily application of at least two times a day (morning and nighttime) for four to six weeks, you can look forward to the benefits and notice great results.


    What each product does:

    1. Novuhair Topical Scalp Lotion – energizes and rehabilitates the scalp
    2. Novuhair Herbal Shampoo – removes build-up that can clog pores and renews the scalp
    3. Novuhair Herbal Conditioner – restores strength and improves hair elasticity, reducing breakage

    Wrap Up

    Much like the rest of the body, our hair goes through changes as we get older. And in some cases, because of genetics, being deficient in vitamins and minerals to promote hair growth and being too stressed slow down the hair cycle further. These lead to hair loss, which can be very traumatizing.

    If you are one who’s losing far more locks than 100-150 hair strands a day, it may be time for you to find and uncover solutions to restore hair the natural way (without wearing wigs or undergoing hair transplantation surgery). If you have thinning hair, ditch heavy styling products like waxes and those that have too much chemicals as they may be too strong for your scalp and your hair will look gappy.

    As a long-term solution, Novuhair is much recommended for people who experience hair loss and hair thinning. I guess this post can be summed up with this statement: “Go natural with Novuhair and get your hair growing all over again.” 🙂

    The Novuhair 3-in-1 Topical Scalp Lotion, Herbal Shampoo and Herbal Conditioner Pack, in 200 mL bottles each, is available as a bundle at all Mercury Drug and Watsons stores with an SRP of PHp 4980. For more information, you can visit Novuhair’s Facebook Page here or contact Nutramedica at 4136570 or 775-8368 between 8:30AM to 5:30PM Mondays to Fridays.

  • Belle De Jour Power Planner Fair and Scavenger Hunt 2013 (SM Mall of Asia, Pasay)

    Belle De Jour Power Planner Fair and Scavenger Hunt 2013 (SM Mall of Asia, Pasay)

    I received an email invite from Viviamo! Inc. last week to pre-register at the 5th Belle De Jour Power Planner Fair and join the scavenger hunt this year. Chelsea from the BDJ Team reminded in the follow-up email that participants must arrive 15 minutes before the start of the event at 10AM.

    Every Bella was anticipating the coming of this day! Belle De Jour Power Planner Fair and Scavenger Hunt 2013 was held at the SM Mall of Asia Music Hall. Activities posted were: the launching of the 2013 Belle de Jour Power Planner, Navi, Forget-Me-Not notebooks, and the newest Everything is Possible Planner. Other than booths for planners, circling the vicinity were the bungee jumping station, wall climbing station, and booths of other participating brands that gave away freebies to promote their products/services.

    2014 BDJ Power Planner
    BDJ Brand Partners
    BDJ Fair 2013 Map

    There were many girls already in queue at the entrance, and I had overheard many conversations about experiences of other girls who joined the scavenger hunt in the previous years. It took half an hour for our pre-listed names to be checked, and we were told to proceed to the briefing area.

    On the night before, I researched online to have an idea on how the game works. However, I found scarce resources and so I just prepared myself to be surprised for anything sporty and adventurous. I wore comfortable outfit (T-shirt, pants and rubber shoes), put on minimal make-up and tied my hair up in a ponytail. I left my bag to my mom to avoid hassles; the only thing I carried was my phone (with camera attached).

    Belle De Jour Power Planner Fair and Scavenger Hunt 2013

    During the briefing, the BDJ staff told us to group into five – either with friends or strangers. I didn’t know anyone so I teamed up with four other bellas who, like me, were first-timers in the BDJ scavenger hunt. We got one another’s names and formed a line. Later, the BDJ staff asked us to count 1-10. All 1’s, 2’s, 3’s and so on had to form a team respectively. So it turned out that the former grouping was just to break the ice, get us organized and meet new people.

    I was placed in the fourth group and we were called Team D accordingly. Again, we introduced ourselves before the start of the game and listened intently to the requirements of the challenge.

    There was a list defining all the specific instructions that had to be completed in each of the 10 stations. Participants had to perform tasks as specified on the paper and keep the paper until the end of the game. A signature by the BDJ facilitator must be secured after completion of each goal. To set the ball rolling, we had to come up with a team cheer, tie our right feet and left feet together with a yarn and walk toward the first station while yelling the cheer.

    The Challenges

    Station 1: Follow the leader!
    This is a shagidi shagidi shapopo game. Members should fall in line between entrance and photo wall. The faci will give list of steps that the leader should do. 2nd person in line must follow the steps whatever the leader does after the song. The third person in line will follow and so on. If one girl missed out the steps, the group will start from the top.

    I volunteered to be the leader and performed random steps such as clapping, jumping, etc. The goal was for everyone in the group to perfectly do the steps and we finished this quickly.

    Station 2: Where’d Gertie the Goat Go?
    Participants will have to locate Gertie the Goat (a paper-mache) in a booth, take a photo with it, and upload the photo on Instagram with the caption “I love dessert for the skin!” and hash tags #TheCreamFactory and #WheresGertie.

    The Wi-Fi Internet connection in the mall was too slow so we had to wait a while for the photo to be uploaded online and show it to the faci.

    Station 3: Make me a masterpiece!
    Pick a card from the faci. Make a picture of the scene you picked and shout “We would love to go to the Subic Grand Seas Resort” while freezing for up to 10 seconds for the tableau.

    We picked the Jet Ski card. Some of us posted as the seawater waves and others acted as if they were riding on a jet ski.

    Station 4: Think backwards.
    Participants must recite the alphabet backwards and shout “ZA” once done.

    There were only two of us who recited Z-A but our performance was accepted anyway.

    Station 5: Let’s share happiness.
    Look for a happy group of friends (minimum of three people) and bring them to the BDJ Timeline area. Have a group picture with the happy group you bring and give the balloons tied in your hair to them while saying “Let’s share happiness. Make it happen this 2014!”

    So we went to the registration area not far from the BDJ Timeline area and convinced three girls to come with us to accomplish the goal. Luckily, they were also supportive of us and we thanked them afterwards.

    Station 6: Be part of our community.
    One member from your team should create or update his/her account in the BDJ community/BDJ Planner Site in the liking booth. While updating, remaining members of the team should yell their cheers facing the booths continuously until updating of account is done.

    OMG. Internet connected really sucked. There were so many steps in creating an account and we didn’t know what to update in the account. The faci ended up telling us that liking their FB page was okay.

    Station 7: You’re more beautiful when you’re wearing it.
    Pop five balloons by sitting on them to find a paper inside. Read the riddle aloud and tell your answer to the faci. Draw the correct answer on the balloons placed on your head using sharpie markers.

    I’m terrified of popping balloons even when I was a kid. So definitely, I could not contribute to the task except for answering the question. It was something like the thing that brightens a day: smile. We wrote personal messages on the commitment wall and proceeded to the next station.

    Station 8: Play with me!
    Assemble the hula hoop pieces. When done, two members from the group will do the hula hoop challenge while the facilitator will ask you three questions. The group must answer the BDJ questions correctly. If the hula hoop fell on the ground and you haven’t given the answer yet, five members from your team must perfectly do a five-second hula-hooping.

    I do hula hooping as a great workout for my abs regularly at home, so I instantly came forward to be one of the two hula-hoopers to help the team. Because the hula hoop was made out of plastic (not the heavy-duty one I’m accustomed with), I had to put more focus on the spinning and rhythm of the hoops.

    Station 9: We are all connected!
    Make 2 Roxy bracelets for your team and take a group picture showing your bracelets. All participants from the group must pass under the limbo rock bar.

    Instead of bracelets, we made key chains as the instruction was changed a bit. It was hard to insert the beads into the string to create a fun piece of accessory! 😯

    Station 10: Give happiness!
    Invite 3-5 shoppers or persons outside the fair area that will complete the pledge “I will share happiness this 2014!” and take a photo at the commitment wall.

    We ran outside the fair and persuaded five people to get inside the BDJ activity area to pull off this second to the last task. And we were down to the last one…

    Last Station:
    Team must yell your cheer then shout “Let’s make it happen…BDJ Fair 2013” and take a last group picture at the photo wall.

    Wrap Up

    We were finally done in 1.5 hours. We didn’t win the scavenger hunt and actually landed on the eighth place, but we had tons of fun. Consolation prizes given consisted of a BDJ Forget-Me-Not journal, a pink pen, some fliers and beauty product samples in a loot bag. Unexpectedly, I didn’t get tired at all but got perspired. And that was a good thing. Whew! 😛

    All BDJ fair attendees got first dibs on the Belle De Jour Event Planner 2014 for only PHp 480 (SRP PHp 589). Mom and I visited the booths and won prizes as well. We left at lunchtime and did not anymore attended the talks in the afternoon.

    I would love to join again next year. See you, maybe! 😛

    [box] Remember that you are part of a much greater universe. You can spark change. You have the power to MAKE IT HAPPEN.[/box]

    For more information about Belle De Jour 2013 Power Planner, you may visit their website at www.belledejourpowerplanner.com and their Facebook page at www.facebook.com/BelledeJourPlanner.

  • Professional Artist Cosmetics (PAC) Launch and Make-up Competition

    Professional Artist Cosmetics (PAC) Launch and Make-up Competition

    Last Saturday, after gracing the opening of Rēis and Irvy’s, Mom and I began searching for a nice restaurant for lunch. On our way to the main building of SM City North EDSA, we were enticed to try a free makeover service offered by Professional Artist Cosmetics (PAC) on the ground floor of The Block. We actually didn’t know anything about the make-up brand. But since the outputs on women who had their makeovers done came out as refined and elegant, we decided to also go and check it out. 😀

    We learned that PAC was launching a new range of products and at the same time having a competition for Filipino professional make-up artists that day, and the preparation for the event started early in the morning.  That explained the whole bongga-cious setup—the lighting, stage, booths, cashier and crew were all put together in an organized fashion. After about half an hour, our “facial transformation” was complete.

    Before I share about the “makeover,” first let me enlighten you more about this brand of cosmetics:

    What is PAC? (Pronounced as P-A-C)

    I was pleased to meet their chief make-up artists and marketing manager who explained that Professional Artist Cosmetics (PAC) by Martha Tilaar was created in August 1997 as the pioneer of professional Asian make-up. The Martha Tilaar Group is the largest cosmetic company in Indonesia.

    Originally from Indonesia and manufactured from Germany, their beauty products started to be distributed here in the Philippines seven years ago. (A quick computation reveals that the year was 2006.) It catered mostly to cosmetologists and professional make-up artists who specialize in stage make-up, bridal and high fashion. The brand has been widely known for its bright and colorful palettes and base make-up which gives good all-day coverage. But now, PAC extends its target market to end users as well.

    When asked what their competitive advantage is against other similar beauty product lines, their claim is that PAC takes pride in offering excellent quality, waterproof, highly pigmented, affordable and long-lasting make-up that’s suitable for different skin types and skin tones.

    Why I have not come across PAC ever since it first became available in the local market might be that their products were sold solely in Landmark outlets & Gaisano outlets before. And truthfully, I have not visited the beauty and skin care department of any branch of those places because I wasn’t particularly a fan of make-up, and I knew that these products would most probably leave a huge dent on my wallet. Not to declare a sweeping generalization or false prejudice but I think that a huge population of Filipinos are the same as me. 😛 We prefer cosmetics that are priced conservatively, sophisticated and on-trend.

    Now that PAC’s past distributor had left, Godiva Inc., a subsidiary of Tao Corporation, took its place and partnered with Watsons to officially distribute Professional Artist Cosmetics in SM Department Stores in leading premiere branches such as: SM Makati, SM Aura Premier, SM North EDSA, SM Megamall, SM Cebu, and SM Davao exclusively. I thought it was a good move, to be able to reach out to more people and obtain more impressions that could ultimately translate to more conversion in sales.

    For more information, you can visit: PAC Beauty Website, Facebook and Twitter.

    “Makeover” with Professional Artist Cosmetics Products

    There was not a drastic change. If at all, the only noticeable highlight was the eye area, where matte black and green eye shadows, PAC’s black liquid eyeliner (PHp 749), PAC’s black Make-up Pencil (Php 599) and quick-drying mascara were applied. Other products used that I remember were: blush for a rosy glow and white eyeliner pencil on my waterline to accentuate my eyes, and sea coral lipstick.

    What I liked best was PAC’s liquid foundation which left a matte finish that covered my facial imperfections well—especially the stubborn bags. The assistant used the yellow tone (other tones: rosy, light and dark beige) and glided the color gently using her fingertips, making my skin appear smoother and just natural (not pasty and super white like a zombie). The feeling was light (almost none) and not sticky.

    After several hours of wearing the foundation inside the mall, my face did not become oily or dry while I normally struggle with a mid-day oily t-zone. I was so satisfied with its staying power that I ended up buying a tube (30mL). At PHp 699, the price is reasonable as it balances off the high quality.

    Moreover, what was astonishing with PAC’s liquid foundation is that its water-proof formula lasts for an entire day (not sure if more). When we arrived at home eight hours later, I washed my face with water and was surprised after patting with tissue paper that nothing came off. The make-up remained intact without a hint of smudge.

    PAC’s foundation also acts as a sunscreen agent and is made with organic ingredients. This product is downright amazing! 😯 I’m beyond excited to use it for the first time at work soon.

    PAC Contemporary Make-up Competition 2013

    The first round of the make-up competition was held the day before, when 5 out of 20 professional make-up artists were drawn to battle in the finals. On Saturday, these five finalists competed and three of them were announced as winners.

    Photo courtesy of @PAC_PH

    They will be moving on to the next round of the competition to represent the Philippines—in Jakarta, Indonesia—joining other contenders from other Asian countries. The round-trip air fare and accommodation would be all for free! The grand winner will take home PHp 30,000 worth of PAC make-up products and of course, bragging rights in winning the first ever PAC Contemporary Make-up Competition.

    Photo courtesy of @PAC_PH

    The Voice of the Philippines contestant Emmanuelle Vera sang beautifully for the audience. Celebrity/Beauty Queen Miriam Quiambao and Model Abbygale Arenas were present in the judges panel. Other VIP judges were PAC’s chief make-up artist Teddy Lim who flew from Jakarta to introduce and promote the brand and share his techniques on beauty and make-up to Filipino women and Head of Sales and Marketing of Godiva Inc. / Tao Corporation Marketing Manager, Edwina Guiyab.

    Congratulations to all winners and to PAC for hosting this successful event! 😀

  • Orthodontic Treatment and Braces are Worthwhile? – My Thoughts

    Orthodontic Treatment and Braces are Worthwhile? – My Thoughts

    Braces: are they really worthwhile?

    If you haven’t read my post on why I decided to wear orthodontic braces, please click here. This is to make sure that everyone is on the same page on the case pertaining to my set of pearly whites. 🙂

    This month is my 15th month of wearing metal braces with the undying hope to straighten my teeth, improve my smile and build up self-esteem. Last night, my dentist had just put on “e-chains” or power chains that link each metal bracket to the next to close the gaps in between my teeth and give me a better and perfect bite. He also replaced the wire to a thicker one measuring 0.022” slot size.

    I will have to endure another four months wearing power chains before proceeding to wearing retainers. My sister who’s also undergoing orthodontics treatment said that the degree or level of pain that is felt wearing e-chains is almost the same as the one in the first few weeks of wearing dental braces. Mine is different because right now, I can say that the pain is just like “business as usual.” I can still eat and talk normally.

    Many people on YouTube share videos of their transformation pictures of teeth month after month or week after week. I, too, tried to take a photo of my teeth in different angles every time the bands are adjusted. But this stopped at the third month because I thought they looked the same starting that month. Here are my before and after pics. Tell me in the comments if you notice any differences. 😀

    Notes:

    1. I visit the dentist once a month without fail. The braces are tightened a little more in every trip. The gradual tightening is what moves the teeth toward the final result of straight teeth.
    2. I use orthodontics toothbrush with extra soft bristles. I brush my teeth four times a day: before and after breakfast, after lunch and after dinner. I don’t use floss because it’s hard for the thread to get into the spaces. Rather, I use the tool that comes with the toothbrush to let out debris that may lead to plague, cavities, tartars and other damages.
    3. I use Rocky Mountain Synergy bracket design imported from the US. According to my orthodontist, this design is the most versatile and most active bracket. It brings more treatment control options than conventional edgewise brackets, reduces friction dramatically and also reduces total treatment duration.
    4. I don’t eat hard, crunchy, sticky and chewy food. It’s not difficult to let go of these stuff because I don’t eat meat anyway and I eat chips, donuts and the like sparingly even before.
    5. I have not experienced nosebleeds like some people who wear braces report to have experienced. Sometimes though, when the pressure really builds up the the day or two after a tightening, headache is the thing I have to bear. Sleeping on it works best but when I’m at work, it’s relieved with a mild painkiller.

    Extended Sacrifice After Braces

    My dentist advised me to wear retainers for at least two years after the braces come off, otherwise teeth will return to being crooked. I thought two years is a pretty long time but then again it may just be worth the investment as well. Retainers help to keep teeth from moving about too much and adhere to their position, and they prevent teeth, cheek and nerve sensitivities from occurring.

    There are two given types of retainers: clear or invisible retainers and wire retainers. Each has its pros and cons. For instance, clear retainers can hardly be seen and they can hold the teeth very well. But the bite may slightly be affected since there would be that plastic material that’s wrapped around the surface of the teeth. On the other hand, wire retainers allow the teeth to naturally “settle” in place but they are bulkier and don’t look as pleasing.

    I choose the clear retainers as they appear like the Invisalign braces that I had initially wanted. These retainers can be removed while eating so that food and gunk won’t get stuck and there are no metal wires that can cause irritation.

    Wrap Up

    Movement of teeth by orthodontic treatment is a slow and critical process that requires good compliance with the dentist’s directions. Oral hygiene must be taken good care of while one is wearing braces else, failure to keep the teeth and gums clean may lead to severe decay around the appliances. This may also significantly delay the completion of orthodontic treatment. At the end of treatment, the prescribed retainers must be faithfully worn, or teeth will tend to move back to their original locations.

    The question on whether or not wearing braces is worthwhile may be a bit early for me to answer now. But I guess the final picture above is one proof that a set of dental braces can do wonders. Wearing metal adult dental braces is tantamount to a couple of years of discomfort and unsightly rail-track braces. However, these are only a small price to pay compared to a smile of perfect teeth and the sort of confidence in appearance. 🙂 I can’t wait to show my teeth off next time—braces-free! 😀

  • Review of Geolica Colored Contact Lenses (Eye Care)

    Review of Geolica Colored Contact Lenses (Eye Care)

    In the last two weeks of June, I knew I had to begin my search for yet another pair of contact lenses, as the “life” of my last pair of clear Air Optix Aqua was nearing its end. Incidentally, The Optical Shop in SM Manila had a big tarpaulin promoting discounts of some branded eyeglasses and Geolica contact lenses.

    In particular, I was interested to buy the Geolica colored contact lenses because I want to see well, feel good and look good. 😀 The price (PHp 1200 for two pairs) was considerably cheap. With much doubt and curiosity, I asked the eye doctor a series of questions before paying out. Here are my findings:

    Geolica Company Background and General Product Information

    1. Geolica (http://www.geolica.com.ph/) as a brand is specifically exclusive for the Philippine market under GEO Medical Contact Lens, Inc.
    2. GEO Medical Contact Lens, Inc. is the branch of GEO Medical Co. Ltd. from Gwangju, South Korea which is growing as a leading venture enterprise specialized in bio-engineering research and manufacturing of contact lenses.
    3. GEO Medical has steadily built up quality-control based productive facilities and adopted new technologies for its ever expanding customer base by supplying innovative and top quality contact lenses along with outstanding service.
    4. Each contact lens passed through innovative technologies with the finest process which made it obtained certificates, permits & approval from Philippine FDA, TGA in Australia, Medical Device License from Health Canada, ISO 13485 CMDCAS,  Accreditation Certificate of Foreign Medical Device in Japan, KOTRA Seal of Exellence and Korean FDA Good Manufacturing Practice Certificate.
    5. Geolica colored contact lenses can be worn for six to eight hours in optimal condition.

    Geolica Colored Contact Lenses For Asian Eyes

    The thing that worried me was the shorter time I could wear the contact lenses —> pertaining to the fifth numbered point above. (Air Optix can be worn for 12+ hours without eye irritation.)

    To solve this, the doctor assured that it’s safe to place drops of lens lubricant to relieve minor irritation, dryness, discomfort and/or blurring if ever I experience these issues. At the same time, the lens lubricant would clean the contact lenses while in the eye and retards the accumulation and deposition of lachrymal minerals on the lenses.

    Another thing that struck me was that the Geolica contact lenses that were on sale are said to be valid for a year’s use. OMG ❗ I thought there may be a big possibility of having a build-up of loosened deposits and harmful microorganisms on lens surfaces. So how?

    The doctor responded and showed me LENSCARE, “a sterile, preserved, buffered, isotonic solution containing sodium chloride, boric acid, potassium chloride, edete disodium, sodium borate, preserved with thimerosal 0.001%.” This product is specially formulated for soaking, disinfecting and rinsing of all soft (hydropilic) lenses including new polymers for extended wear. And this comes with the Geolica package from The Optical Shop.

    OK. I was convinced.

    Selection of Color and Design

    The next step was to choose the color and design. They have a catalog of the different colors on paper but none on a picture of a real person. Because of this, I could not see how the colored lenses would look like once worn and matched with my dark brown/black eye color.

    Colors (one-tone) to choose from were: Lady Aqua Blue, Lady Lime Green, Lady Light Brown, Lady Pearl Grey, Lady Cobalt Blue, Celine Violet, Celine  Blue, Celine Green, Celine Pure Hazel, Celine Grey, Celine Brown, Circle Natural Brown, Circle Choco Brown, Circle Dark Black or Circle Dark Brown. They also have the two-tone and three-tone colored lenses which were highly recommended to me by the staff.

    With fingers crossed, I chose the three-tone brown (left below) and gray (right below) ones and got my order the next day (because mine are graded).

    Review of Geolica Colored Contact Lenses

    Appearance: I started wearing the brown lenses on July 5, 2013. It was a Friday and many people in the office noticed how my eyes looked differently. I also laughed at myself when I first looked at my reflection on the mirror. 😛 Popular comment I got was that the pupils of my eyes became enlarged. 😯 Enlargement was not one of the features I sought when purchasing these lenses; nonetheless, it’s okay.

    The color shows up well in most light. If you’re far from me, you might not see it in an obvious fashion. When you’re up close, you’ll vividly see that the design has spikes of golden brown and dark brown shades and you’ll know immediately that I’m wearing colored lenses. 你能看得到吗?

    Comfort: Right now I’ve been wearing this pair of Geolica contact lenses for three weeks. Level of comfort is fine but at first my eyes tend to go watery and sometimes it takes more time for me to adjust them properly into the eye circle.

    I have my contact lenses on for 12 straight hours to work, at work and from work. Rarely do I experience dryness. When I do, I just follow the doctor’s instruction: drop the sterile lens lubricant to moisten the contact lenses thereby reducing friction against the cornea.

    On the whole, comfort level is not as high as the Air Optix but is satisfactory in the sense that I’m not bothered while they’re on and I don’t see or feel any hindrance to my vision at all.

    Price for Value: I’m very pleased with the affordable price of Geolica contact lenses. I get to really save more because a pair of FreshLook colored contact lenses, from what I remember, costs PHp 450 (good for a month’s use), while Flexwear Colors (2 pairs of 3 Months disposable soft contact lenses of the same color) cost PHp 650 and Sarabia Optical offers PHp 600 a pair. Other brands are even more expensive.

    Instructions and Precautions

    1. Always wash and rinse your hands thoroughly before handling your lenses.
    2. After removal of your lenses, clean each lens with the cleaner on both surfaces. You may be advised by the eye doctor to rub both lens surfaces for 30 seconds either in the palm using the forefinger on the other hand or between the thumb and the forefinger, while some lenses are not for rubbing.
    3. Rinse surfaces to remove deposits and debris. You can make it a habit to clean and rinse the same lens first (either left or right) to avoid mix-ups. (In my case, I can go for whichever first because I have the same eye grade in both eyes.)
    4. Place each lens in the correct chamber of your storage case.
    5. Close the covers tightly.
    6. The lenses must be soaked in this solution for a minimum of four hours before reinsertion.
    7. Always use fresh solution. Discard solution in storage case after use, rinse and allow to air dry.
    8. Keep the bottle tightly closed when not in use.
    9. Never touch the dropper tip to any surface since this may contaminate the solution.
    10. Store solution at room temperature. Keep away from freezing.

  • Review of Monea Powerdose Plus Hair Treatment (JTomas Collections)

    Review of Monea Powerdose Plus Hair Treatment (JTomas Collections)

    As I’ve heard, “powerdose conditioning treatment is the most intense hair repair treatment available to salons.” Here in Manila, Philippines, powerdose and hair conditioning treatment services that reinforce and optimize your hair from the inside out usually cost around the average of PHp 500. Some salons base the price on the length of your hair. So if you have long hair like I do (almost reaching the waist), expect to pay more.

    For that, I say, “No, thanks.” I prefer to save tons of cash with purchasing a product I can use at home while I receive the same “treatment.” This post features a hair care product that can do just that: Monea Powerdose Plus Soft and Bouncy (250g) (PHp 250).

    Monea Powerdose Plus Soft and Bouncy Hair Treatment by JTomas Collections is a deep conditioning treatment that you leave on your hair for 10-20 minutes and should be used at least once in two weeks. Apparently, this product has been out in the market in 2012 (available in Landmark, Watsons, Unimart, Cash & Carry, RB Hortaleza, Gaisano Outlets and health and beauty section of supermarkets and department stores nationwide). But since it’s always almost sold out in stores, I have not seen it before until it was shipped to my door last week.

    I tried using it following these instructions, as shown on the label:

    How to Use Monea Powerdose Plus Soft and Bouncy Hair Treatment

    1. Wash your hair with shampoo and conditioner during your bath, just like in normal days.
    2. Apply Monea’s Power Dose (Green) Product on your scalp to the ends of your hair.
    3. Gently massage your scalp and leave Monea’s Power Dose (Green) Product for 10-20 minutes.
    4. Rinse it off with water.

    Monea Powerdose Plus Soft and Bouncy: Likes and Dislikes

    Not having straight-as-a-board hair anymore after the digi-perm procedure last February, I don’t have spend time prepping and styling my hair before going out. However, I still have to apply Monea Curl Defining Milk Lotion, or my hair would go unruly and look frizzled.

    Thanks to Monea Powerdose Plus Soft and Bouncy, my hair felt really softer and lighter, and this went on for the rest of the day. The tips didn’t go tangled, even without me using those other hair care products. Another good point is the fragrance, which is like “fruit-forward,” sweet but not too strong.

    What I don’t like about it is that the consistency of the substance. it was not too thick like I expected. I just think that thicker conditioners coat the cuticle of the hair more.

    Wrap Up

    So far I didn’t encounter any irritation on the scalp. So I guess this bottle of Monea can be described as a powerful, rinse-out repair treatment with effective results (not sure if long-lasting).

    Whether you have digi-permed hair like mine, colored, treated or natural hair, you can trick your gorgeous mane to be bouncier and silkier maybe with this powerdose conditioning treatment. 🙂