Category: Beauty

  • On Cameras and the Human Eye: Why Do I Get Red Eyes in Photos?

    On Cameras and the Human Eye: Why Do I Get Red Eyes in Photos?

    “Why do I get red eyes in photos?”
    How can I prevent red eyes in photos?”

    These are the two questions that we’ll try to answer and discuss in this article.

    Avoiding red eyes in photos

    We’ve all taken great photos—only to look at them later and find that everybody has glowing red eyes. Why does this happen?

    The red glow is what happens when the bright light of a camera flash causes light to reflect off the retina.

    Animals have a reflective layer on their retinas that’s like a mirror in the back of their eyes. For example, if you’re driving at night and a deer suddenly appears in front of you in the road ahead, you can see the reflection of your headlights in the animal’s eyes.

    Humans don’t have this special layer. So when something really bright—like a camera flash—reflects off our retinas, we don’t see a white light, we see red because it is a reflection of the blood vessels in our eyes.
    How can we prevent red eye?

    Hint: Try not using the flash.

    This would mean that there wouldn’t be enough light for the camera, resulting in dark photographs, unless you only take photographs outside in bright daylight or in well-lit rooms where the pupil would be contracted enough to not let as much light through.

    If you have a camera with a detachable flash, you could try holding it away from the lens of the camera, or even point it upwards so that the light bounces off the ceiling, or walls, instead of off the retina.

    Most point-and-shoot cameras don’t have a detachable flash option, though. And while some modern cameras have an option to have a “smarter” flash, these can be expensive and tricky to use if you just want to point the camera and take a picture.

    Use a “red eye reduction mode” on your camera

    Many modern cameras have this feature. It works by making the flash go off twice, very quickly. It goes off once before the actual photo is taken and then again to take the photo. The light of the first flash makes the pupils contract so that less light gets to the retina when the second one goes off.

    This option isn’t available on all cameras though. And even when it is, it’s not very reliable. It only promises to “reduce” red eye, not remove it completely.

    Remove red eye post-production

    Most digital cameras come with software that enables you to remove red eye from photographs after the picture has been taken, or you can use an editing program on your computer. Anywhere that prints digital photos should allow you to look at your photos before printing so that you can edit them that way.

    Smartphones usually have an app that can detect red eye in photographs and remove it and for printed photographs special pens are available that are supposed to be able to remove red eye too. Or you could always scan a paper photograph and edit it that way.

    Wrap Up

    There seems to be a few options for avoiding and removing red eye, but the best way seems to be to not look directly at the camera so that your eyes aren’t looking full on at the lens when the flash goes off. It’s also worth noting that you are more likely to get red eye when you’re drunk.

    Alcohol slows down the body’s reactions, and this includes the speed in which the eyes respond so that your pupils will take longer to react to bright lights. Something to remember at the next party…!

    Nothing in this blog post is to be construed as medical advice, nor is it intended to replace the recommendations of a medical professional. For specific questions, please see your eye care practitioner.

    This article is contributed by Shelley Abrahams, one of CooperVision’s copywriters. She has a passion for photography, particularly portraits. As an employee of CooperVision , she has a keen interest in eye health and the anatomy of the eye.

  • Why I Started Wearing Contact Lenses

    Why I Started Wearing Contact Lenses

    I bought and wore contact lenses for the first time last March 26, 2013. Dr. Pajaro, the eye doctor from Ideal Vision (SM Mall of Asia), had patiently briefed me about the costs of different types of contact lenses including the solution to clean and maintain them. That day after work, I also visited the rest of the optical stores in MOA, namely George Optical, EO Executive Optical, Unique and Sarabia Optical, where I asked for suggestions from staff and compared prices to get the best buy.

    Since Ideal Vision offered me the best service and gave me the most valuable information I’ve been wanting to receive, it was hard to decline. I got the Air Optix Aqua Contact Lenses, thanks to Dr. Pajaro’s recommendation. He checked my eye grade and confirmed that it still hasn’t changed (I have 120/120 vision). He didn’t give up on his many attempts of putting contact lenses on my eyes.

    Whenever the contact lens touched my eye, the immediate effect was that my eye would start watering profusely. Then I had to pause and breathe, calm down and signal to resume. The doctor again would clean the lens with the liquid solution and try again.

    As the saying goes, “Hard work pays off.” We believe that and we were done after an hour. 😛

    When I reached home, I happily announced to my family that I got contacts on. I watched videos online to learn how to remove them, before going to sleep. The tutorials on YouTube showed simple procedures, yet I could do not them myself. Daddy quickly did it for me instead. And that went on for the next three weeks, until I learned how to wear and remove them on my own. 😀

    Why I Started Wearing Eyeglasses

    Flashback eight years ago, I was seated at the third row from the front of the classroom. Our high school math teacher was writing mathematical equations on the whiteboard for the day’s lecture. The distance was only about ten steps away, but I could hardly see clearly. I kept on squinting my eyes, wondering if his handwriting was just too small or if the whiteboard marker’s ink was just too light. So I would usually have to go nearer to copy notes for my review. My other classmates would do the same; I was not the only one. Maybe, then, my reasons were right. And I could have remained wondering forever.

    One day, I took the courage to have my eyes checked. My mom and I visited the optometrist nearest our place. According to the eye test, both of my eyes had 50-50 degree.

    Finally, an answer.

    So it was my nearsightedness. I had to wear eyeglasses — eyeglasses which I didn’t want to wear for a lot of reasons.

    Why I Hate Wearing Eyeglasses

    I could not wear glasses while dancing or doing other sports because they will fall off, causing deterrent and distraction on my focus.

    I could not wear glasses when it’s raining. They are not equipped with wipers to wipe away the raindrops on the lenses.

    I could not wear glasses when there’s a big change in temperature (the lenses tend to fog very easily).

    I could not wear glasses because I tend to constantly adjust the edge of the frame from the bridge of my nose upwards. They are super uncomfortable.

    I don’t want to wear glasses because I don’t feel confident with how I look when they’re on.

    The distance between my eyes and the lens creates distortion, adding only to my poor peripheral vision. This is why I prefer wearing large-frame glasses.

    Few instances led me to see in perfect vision through those lenses: when something is being projected from a computer and when the professor’s handwriting is tiny. I had to remove my glasses after class and proceed with seeing the world with my imperfect vision. That went on through college, even when my eye degree went up double,  to the time I had my first job when I only wore glasses during meetings and presentations.

    I did not consider wearing contact lenses then because I thought they’re high maintenance. Besides, I could not dare to deliberately place my finger to insert and remove the lenses onto and from my eyes. My eyelids would involuntarily close my eyes, like repelling automatically from some alien.

    Why I Started Wearing Contact Lenses

    So here’s the big question: “Why made me decide to wear contact lenses?”

    Apparently, my “hatred” to wearing eyeglasses had been raging for years – so much so that I felt that I’ve had enough reasons (as stated above) on why I need to try wearing contact lenses.

    I’ve read several blogs and websites say that contact lenses cater for more natural vision, as there’s no distractions, no weight and resulting discomfort. Also, there’s no frame constantly slipping down the nose, no annoying obstructions or reflections in view, and no collections of precipitation and fog that blur vision. Contact lenses, unlike framed eyeglasses, can match everything I wear. There’s also no glare and reflection that detract people from seeing my eyes.

    Review of Air Optix Aqua Contact Lenses

    After over a month of wearing contact lenses consistently, now is a good time to share my “Air Optix Aqua contact lenses” review.

    Comfort: Air Optix Aqua contact lenses, compared to regular contact lenses, have higher oxygen transmissibility, the eye doctor says. The Air Optix Aqua contacts are designed for extended wear. Produced out of patented lens material, these contacts help minimize the rate of lens dehydration. This is why they can be even worn while asleep and up to 18 hours in a day and still retaining moisture. (But of course, I still limit the number of hours that I wear them.)

    Its website claims that there’s “rich, nourishing oxygen flows continuously through the lenses – for white healthy looking eyes.” Oh, I was not aware that our eyes do “breathe” as well, so as far as that statement goes, I could probably relate to it to some extent. The contacts are pretty comfortable and I haven’t encountered any problem thus far.

    Price for Value: At PHp 1350, the package I bought consists of six clear disposable soft lenses (three pairs, one pair per month). A normal pair of monthly disposable contacts (not hydrated ones) costs about PHp 150 only. Next time, I have to try wearing them also just to feel the difference and have a more meaningful judgment on whether or not the Air Optix contacts are worth the expense in every way.

  • How to Maintain Your Weight, Control Your Diet and Even Lose Some Pounds

    How to Maintain Your Weight, Control Your Diet and Even Lose Some Pounds

    As I can sustain my ideal weight and physical fitness for years now, people usually think that I eat healthfully like 100 percent of the time, or that I do not have a sweet tooth, let alone ever give up to one. But my buddies and family can attest that: I give into sweets consistently — but not as regular as “every single day.” I mean, sure, it’s important to eat healthy 365 or 366 days a year, but you can bend the rule as long as you know the steps to just be right back on track.

    Here are simple strategies I have in my lifestyle. Maybe they can fit into yours?

    How to Maintain Your Weight, How to Control Your Diet and How to Lose Pounds, According to Me 🙂

    1. Eat rice to a minimum – less than a cup, in every meal!

    There are days when I eat rice for breakfast, lunch and dinner. But in each instance, I see to it that I don’t consume more than a regular cup’s content. When you’re out in a restaurant where rice-all-you-can promotion is offered, perhaps you would succumb to the deal to suit your crave. But if you want to be dead-on serious with eating right, don’t go running after it with reckless abandon.

    2. Eat on time.

    Eating at the same time pronto every day teaches the body system to adapt to a “diet clock” or alarm system that helps our metabolism to become faster. Some sites say that this is a myth, but I think it works for me. I don’t skip meals and I can’t afford to do it so. Not eating will only trigger more hunger pangs and that might lead to eating something unhealthful.

    3. Indulge within reason.

    Set a calorie count to limit your indulgence. For example, you can choose to eat a small piece of chocolates every day if you want to. But make sure that you also consume the least number of calories you can take. There are many types and forms of chocolate. You can opt to have a 30-calorie square of dark chocolate instead of a large 300-calorie bar. You can also save one day in a week to indulge (think “binge day”) yet stay conscious of your food choices.

    4. Measure your weight after meals.

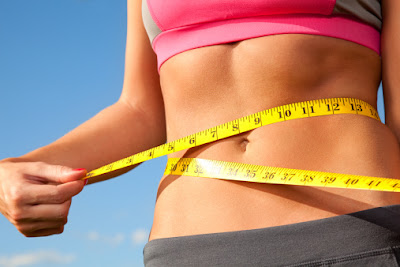
    Did you know that your weight varies throughout the day? I have experimented on this idea… I weighed myself upon waking up in the morning without taking breakfast and after breakfast, lunch and dinner. I noticed that there’s about 1-2 pounds of difference.

    For some people, the added weight after meals may extend up to 3 kg. So this technique is only to make yourself feel guilty on taking that much food when you can always try to minimize your food intake.

    5. Don’t be tempted.

    There’s a giant treasure trove of savory treats in every corner of the city. But I’ve trained myself to battle against these temptations over food. When I am not hungry or when I’m full, I won’t eat any filling snack even if I walk into a den of invitations. On these occasions, another way to control your diet is to redirect back to your healthy eating path. There may still be the little devil on your shoulder beating up the angel right next to it. So channel to another voice and become your own cheerleader.

    6. Wear super tight clothes.

    While this may not be a good suggestion for everyone, wearing tighter clothes would pull down your self esteem whenever you see fats oozing out hence push you more to stop overeating and concentrate on being fit. Of course, you will feel bothered about your appearance and you are less likely to reach for that extra cup of rice when your muffin top hanging out quite offensively. And oh, don’t be annoyed when someone poses a nasty remark on you. Just think that while you are doing this for the better, they are going for extra helping of food that would make them put on weight.

    7. Don’t buy lots of food.

    When you buy lots of food, the tendency is for you to think that you should finish them all—maybe worse, in one seating—as there’s the need to make sure you’re “getting the MOST calories per peso (or dollar) spent.” If you do this, you’re done for! So a better way to control the amount of food you eat is to order less. After eating, drink a full glass of water and maybe more. If you still feel hungry, then it’s about time to order another small serving of something—but feel guilty about it. 😛

    8. Exercise

    If you want to shed some pounds and melt your fats, get out and spend time to exercise and incorporate physical activities that build muscle in your daily or weekly schedule. Lean muscle mass will help burn calories. Amongst other positive aspects, exercise gives improved cardiovascular system, improved feelings, faster reflexes and elevated muscle tone. And these are some reasons why I still continue my wushu trainings even when I feel lethargic. 😀

    9. Chew on ice cubes.

    Ice cubes consist of water, so it’s safe to assume that they do not contain heavy calories. To keep your mouth busy all the way and prevent the feeling of hunger, sucking on ice cubes can help. Your taste buds would also be frozen and it won’t be getting much of the tasting from the food you eat. Trust me, your waistline will thank the ice later!

    10. Face a full-length mirror and jump.

    If you can, go in front of a mirror with your undershirt rolled until the chest area and jump! See how much fats have jiggled and shake them vigorously, touch them and feel ashamed of them. This is called the unscientific “fat test” that you can perform every day if you’ve got time. You can also do the same test with your cheeks, arms, thighs, etc.

    Wrap Up

    There you go. These methods may be an arduous task for those who are only starting to maintain their weight and lovable figures. But if you really want to control your diet or lose some pounds, practicing these commandments are easier Instead of sticking to a diet of rabbit food (aka carrots and cabbage) all the time. You can’t escape indulgences but if you form these steps into a habit with discipline and determination, they will be your second nature, easy-breezy!

  • How to Take Care of Digitally Permed Hair

    How to Take Care of Digitally Permed Hair

    For about two years, I had been wanting to have digitally permed hair but I could not…because of the price. In SGD converted to PHP, the service plus the products would cost at least PHp 5,000. I thought I could use the money to buy more important stuff or add it to grow my investment fund instead. Yet I still found time to research about digiperm and wrote a summary of it in my other blog.

    Last January, I saw an online deal P888 instead of P6800 for Digital Perming with Treatment, Haircut & Back Massage at Mary Pauline Salon (10 Branches) posted by Metrodeal. That was 87% discount leh! The ad highlights were as follows:

    • Achieve loose waves and shiny curls with a Digital Perming treatment
    • Comes with treatment, haircut and back massage
    • Less time spent on styling your hair with curls that lock in place
    • Treatment adds more volume and bounce to those tresses
    • Revive those curls with a twirl of a finger
    • Treatments are facilitated by well-trained staff to ensure proper care

    How could I let it go?

    I couldn’t. 😛

    I bought the voucher online immediately and went to the physical address of Mary Pauline Salon (Masangkay branch) to book for a reservation. Since I knew that newly digipermed hair can’t be washed and can’t be tied 48 hours after the procedure, I had to time it when we don’t have wushu practice. I didn’t want to go training without a ponytail and more than that, I didn’t want to go to work with hair marinated with perspiration. So I made a call to have the “drastic change” done before Chinese New Year, when our wushu team was busy training for their lion and dragon dance performances. Whew. 😀

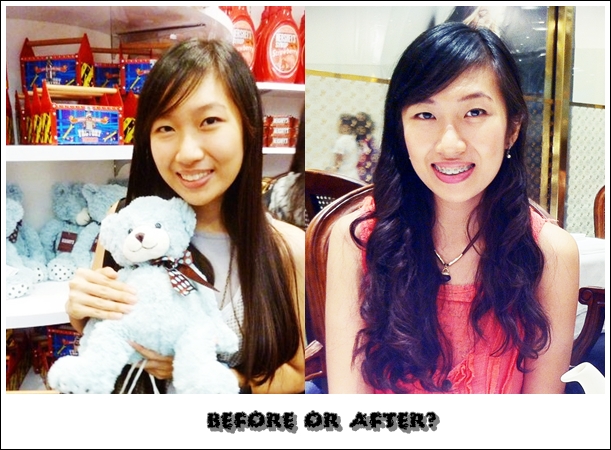
    Today, my digitally permed hair is exactly three weeks old. From a naturally straight hair, my hair now looks like this:

    My Experience with Mary Pauline Salon ~ Hot Perm Treatment

    Before we got started, I showed the stylist some pictures of Korean actresses’ digi-permed and treated hair that I wanted to achieve: gentle waves / big curls. In contrast, he advised to get smaller curls because they would eventually become loose after six months and become larger curls before becoming straight again. When asked if my hair should be cut, he said the length and the shape of my hair (‘V’ in the end) are already ideal for digital perming. So there was no cutting done—and no back massaging either. (Er, I forgot to ask about the latter.)

    Anyway, the entire procedure lasted for almost five hours. I can’t remember the exact number of minutes per step but the hairdresser performed the following: washed my hair and put the mixed protector, conditioner and in-house solution for absorption, rinsed my hair, segmented it and rolled each grouped strand to the curler, placed heat protection pads and secured each rolled strand with a tie, attached the curlers to the hot rods connected to the perming machine and waited for the longest time, washed my hair for the last time and squeezed it with a towel without blow-drying.

    I looked at my reflection in the mirror and blinked to test if something different would appear next. Nope. Gasp! I actually have curled hairs now, was in my thought bubble.8O Before I walked out of the salon with wet hair, the salon staff gave me some tips to manage my digi-permed hair.

    Mary Pauline Salon

    How to Take Care of Digitally Permed Hair

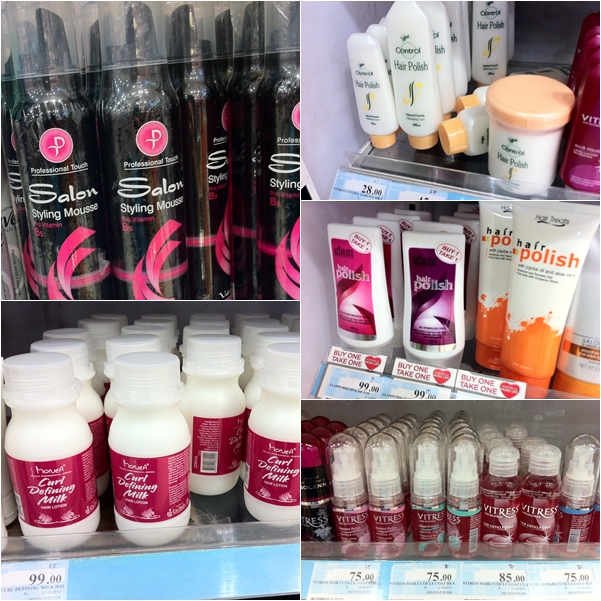
    1. Apply hair polish after a shower or bath while hair is still damp. This is to easily style the hair afterwards and make the curls more defined. I bought Splash Control Hair Polish at PHp 28 and Monea Curl Defining Milk Lotion (in the picture below) at PHp 99 both from Watsons.

    2. Never comb the hair as doing so will only make it uncontrollably frizzy and messy. The only part that can be combed is the upper part where my original straight hair is and the bangs.
    3. Do not rub digi-permed hair with a towel for this will also make the hair tangled and frizzy as well. Fingers can be used to undo tangles.
    4. Section the hair to two, create partitions, wound each partition inward and twirl the waves using the index finger to add more bounce to the curls.
    5. Use shampoo and conditioner every day. (I think this is simple logic, even for un-permed hair.) He didn’t suggest using special products for permed hair so I’m still using my current ones (TRESemmé).

    Other Hair Maintenance Regime I Got From Blogs and Websites

    1. If you have dry hair which is fragile and prone to breakages, use hair products that are friendly to the hair. Recommended are Keratase Nutritive Bain Oleo Curl Definition Shampoo and Human Heart Nature’s Avocado and Seaweed Moisturizing Conditioner. You can also use other brands of products, but make sure that they have ingredients such as almond oil, jojoba oil, avocado oil and Vitamin E used to soften permed hair, add more gloss and hydration.
    2. Avoid using hair dryers and just let the hair dry on its own. Blow-drying permed hair will cause more split ends you will regret and make it unruly.
    3. Go for hot oil treatments or apply deep conditioning creams once a week. This will pamper your locks and let the oils saturate through the hair cuticles that will help strengthen weakened hair strands from the inside.

    Taking care of digitally permed hair is not as hard as I thought. I have low maintenance with my hair even before, and I really don’t put in a lot of effort combing and styling it every day. Having permed hair now made me feel more feminine and extra presentable. But looking back to my pictures with straight hair, I say I still prefer my former hairstyle! Wahaha.

    What say you? Let it flow in the comments. 😀

    UPDATE: This branch of Mary Pauline Salon in Masangkay has been closed down already. Last check was July 2013.

  • 5 Steps on How to Streamline Your Fashion Wardrobe

    5 Steps on How to Streamline Your Fashion Wardrobe

    Every so often when I have the time, I dedicate about two hours to streamline our wardrobe. Since my sister and I share one giant cabinet of clothes, sometimes the piles get messy. While there should be a dividing line between casual wear and office attire for us to easily choose clothes every morning before showering, we hadn’t spared any time to decide on how to organize and set this up. Last weekend, mom called me to segregate those clothes we can donate to charity/church. I felt it was a great timing for me to streamline our wardrobe as well.

    Because my sister was not home, I had the sheer liberty to “throw away” those I think don’t fit us anymore. Also, I came up with some the following rules which can be helpful to you as well. Note that these tips cover not only clothes but also shoes, accessories, bags and other garment.

    5 Steps on How to Streamline Your Fashion Wardrobe

    1. Get rid of torn pieces.

    This sounds too basic but I sense that many people still keep their favorite old shirts after it has been damaged for so long. If you see fading, apparition of holes and other signs of wear and tear, eliminate the clothing as you will less likely to wear it in public anyway. If you cherish it much and it can be worn comfortably at home, then maybe you can stock it up in the sleeping attire section.

    2. Don’t hold on to items which you have not worn in the past six months.

    This is except if it’s a classic vintage material that you can pass down even to your next generation. But the rest of the clothes you haven’t worn for so long a time are only collecting dust, getting ready for deterioration and taking space in your closet.

    These are perhaps clothes that you bought because they were the last pieces on the sale rack you’ve been saving for a special occasion. If it’s for the wedding of your four-year-old brother, then passing it on to others would be a safe decision. Make 2013 the year you set them free at last!

    3. Do away with clothes which are not your size.

    You saw a really pretty dress in a store. Unfortunately, they don’t have it in your size. Desperately, you still bought it thinking you will achieve your dream body figure. High-five for that positive thinking. The sad thing is that it didn’t happen.

    So here is the mantra you should live by: Don’t ever get clothes that do not flatter your figure, even if they come with cheap price tags. Instead of online shopping, go to the physical store and try the clothes on. Forget relying on the size written on the label and go with your instincts. Do you see that it fit perfectly right? Have a critical evaluation when you look at yourself in the mirror.

    If you currently have those items that don’t fit well, do not have second thoughts on donating them. Do it fast and trust me, you’ll feel great.

    4. Organize what’s left.

    After eliminating everything that needs to be eliminated, the next step is to organize the rest of the clothing that passed your tests. In this part, you can follow these arrangements: by color, by category or by outfit. To make them look better as a whole, get good-quality hangers and closet organizers for hard-to-hang items.

    5. Shop for missing or required items.

    This is the really fun part! Now that you’ve streamlined your wardrobe, you probably realize you need a few key staples. With your new system in place, you know exactly what to buy!

    In this case, I need…
    (1) A purse that is not black – I’m thinking of a snakeskin minaudie`re, a tangerine-hued clutch or a tasseled fuchsia satchel.
    (2) A little black dress that I can always feel great in regardless of the the party guest list
    (3) A neon-colored pencil skirt, jacket, dress, bracelet or bauble that brightens an otherwise all-black outfit

    On second thought, I changed my mind! I’ll just save some more bucks for the car. Holy Camoly, it’s quite expensive leh. 😯

    Anyway, hope you keep these steps in mind. Don’t worry, there won’t be a quiz afterwards, but hopefully, there will be dinner. 😀

    Do you have suggestions on how to streamline your wardrobe? You’re welcome to educate me in the comments.

  • Review of Blue Elements Wellness Spa (Congressional)

    Review of Blue Elements Wellness Spa (Congressional)

    Golfing, skydiving, yachting are all extravagant hobbies which many cannot afford. These are the activities that are mostly exclusive to the wealthy.

    But who says these are the only things that can make us happy?

    Aside from eating, indulging yourself to cheap treats can be enjoyable. For instance, getting a massage or spa service is one recreational activity that won’t burn a hole in your pocket.

    Together with my mom and sister, I traveled to Visayas Street along Congressional Avenue and found Blue Elements Wellness Spa yesterday.

    Relaxation and “Me” Time

    What are we to do when even an hour becomes too much time to spare? With the daily stresses causing bane to our bodies, we have to find time to relax. Going for a massage is one good solution to knead out our tensed muscles and free us from mental burdens.

    There are many spa centers in our area. We also have masseuse who personally goes to our house by call reservations. We pay her PHp 200 for an hour of full-body massage.

    So we won’t go that far to Blue Elements Wellness Spa if only CashCashPinoy.com had not promoted this captivating deal: at PHp 250 (for an individual coupon), each of us availed of Blue Elements Wellness Spa’s ear candling and Swedish massage services.

    Ear candling lasted for 20 minutes, while the massage which took an hour. Original prices without the promotional coupons are PHp 300 and PHp 220 respectively.

    The Experience

    As we entered through the main door, we were greeted by three female staff who were all clad in blue top and bottom uniforms.

    Mom presented the printed vouchers. The woman behind the counter called Mom to note that two vouchers had the same reference numbers. One could not be used because this meant we only got two unique voucher codes.

    Mom was quick to respond and point her mistake out, and the staff felt sorry. In reality, this checking staff is either blind or just plain super careless without any good eye for detail. She failed to read the name of the customer and the reference code as a whole. Instead, she only focused on the last five digits after the hyphen!

    In five minutes, we were asked to get in to the massage area.

    Inside was very dark, with dim blue lights and insufficient air-conditioning. The room was arranged with mini rooms of massage beds divided by sheer curtains. When my visual capacity had managed to adjust in the dark, I could see more vividly. And I could also see the person lying next to me on the bed because of the translucence of the curtains.

    Male and female customers were not segregated, so there’s a fat chance that peeping toms can take all pleasure in seeing the person beside them. There were CCTV cameras installed on top of the corners of the room to monitor the ins and outs of people walking in the hallway.

    The room had a certain light scent of aromatherapy oil which did not contribute as a relaxing factor.

    There were no lockers to put our belongings. No proper instruction was given until we asked what we’ll do to prepare for the massage. One staff was even confused and first told us to wash our feet and go back to the waiting area. But immediately, another staff called her attention and corrected her directions.

    Mom and my sister laid on adjacent massage beds, while I stayed in another mini room as space was not enough for the three of us to be in one mini room.

    My masseuse asked me to remove my shirt and pants and wear the shorts (too big for me) provided on the bed. I placed my clothes and my bag beside my head, not knowing where to hang them. Of course, they could potentially be objects of distraction once the massage procedure begins. I thought the staff really lacked consideration on this. I had to request for hangers for her to properly put my things aside securely.

    Before putting on pressure, she would always ask me if her force was tolerable. She began from the back of my legs and feet, my back from the shoulders to the pelvis area, the front of my legs and feet, both arms, chest, and head. The massage was fair but not really much satisfying than what what we’re used to.

    Next was ear candling which I was more excited about. It was my first time to have my wax in both my ears sucked up by ear candles. I saw the hard formation of the ear wax afterwards but felt no difference in hearing. I thought I could hear sounds more clearly and loudly.

    When the ear candling procedure was done, the masseuse offered me a cup of tea or hot water. I chose the former. She left the mini room and returned with the complimentary hot tea and a small flowery purse which I wronged as a giveaway. I did not take the purse and did nothing with it.

    Later I learned from my mom that it was supposed to be where customers give tips to the masseuse. Oh, if I had known, I would not bother to give any tip as well.

    Will I Recommend Blue Elements Wellness Spa?

    As you’ve reached this far, you may have guessed the answer is “No.” The sense of fulfillment was inexpensive, and their overall performance and presentation was okay. But they are not worth going for considering the proximity of distance and the rate of enjoyment I experienced. Without the discount, their services are surely not worth the price.

    Blue Elements Wellness Spa Services

    If at all you’re still interested to try Blue Elements Wellness Spa’s services after reading this review, note the following details:

    Open hours: Every day, from 1PM to 1AM (Last call is at 12AM.)

    Treatments/Services and Rates:

    Blue Elements Body Massage: PHp 350 (one hour)
    Pinoy Hilot Body Massage: PHp 320 (one hour)
    Stone Massage: PHp 450 (1.5 hours)

    Swedish Massag: PHp 220 (one hour)
    Chi Thai Massage: PHpt 199 (one hour)
    Shiatsu Massage: PHp 199 (one hour)
    Foot Massage: PHp 199 (one hour)
    Foot and Hand Reflex: PHp 180 (one hour)
    Foot Spa: PHp 199
    Foot Spa and Pedicure: PHp 300
    Pedicure: PHp 100
    Manicure: PHp 100

    Address: 21 LRI Building Congressional Avenue Quezon City

    Contact Numbers: 02-6229450; 0917-5403456; 09224618939

    Thanks for reading! 🙂 Feel free to share your experience with Blue Elements Wellness Spa in the comments section below.

  • Why I Decided to Get Orthodontic Braces – The Big Reveal!

    Why I Decided to Get Orthodontic Braces – The Big Reveal!

    Pacquiao vs. Marquez. Tito Sotto vs. bloggers. Obama vs. Romney. For all of the great debates that have been controversial this year, no brave soul has dared to tackle traditional metal braces vs. Invisalign braces and feature it as a trending topic in the country.

    I know most people are already familiar with traditional braces. What about Invisalign? It’s not yet a popular choice in the Philippines. Actually, it’s a fairly newer method of teeth straightening which I discovered only last year in Singapore through Xiaxue’s blog.

    It was tempting to opt for Invisalign—those clear plastic aligners—because they appear almost invisible. Moreover, the shifts and transformation process of the teeth can be 5-10 times faster. What wearing traditional braces can accomplish in two year’s time can be done in like 10 months. I just could not spend that much of money (average of 6000SGD) just for teeth cosmetics!

    Also, from what I heard, aside from the price, one major disadvantage of using Invisalign is that it has to be removed when eating and/or drinking. This is unless you want the thing stained. So if you’d be an obedient patient, you must abide by the golden rule: Don’t consume any food with them in.

    I imagine putting them on and off in the public…and I think what an embarrassing act it will be, especially when dining out with friends. It’s also strongly advised not to drink hot water (even if color is clear), else you will put your teeth at extra risk.

    Invisalign can work for those with minor dental issues and may not work for everyone. For these reasons, I chose to go with traditional braces. Same result will be achieved anyway…

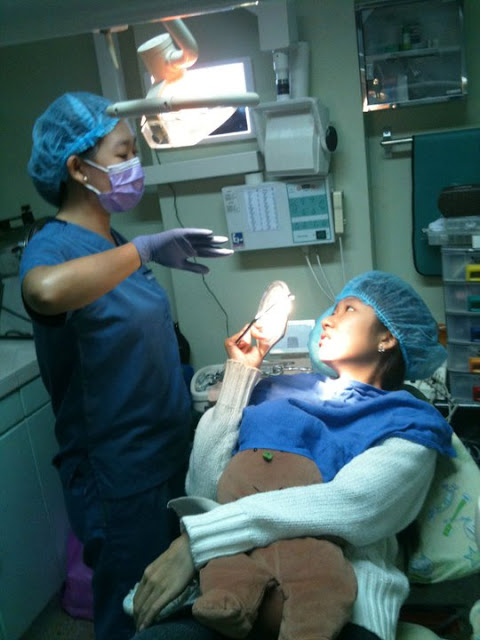
    Since I was in college, I have been wanting to put braces on my teeth. No, it’s not for aesthetic display as some people wear braces as accessories. They are for real—to straighten my misaligned teeth.

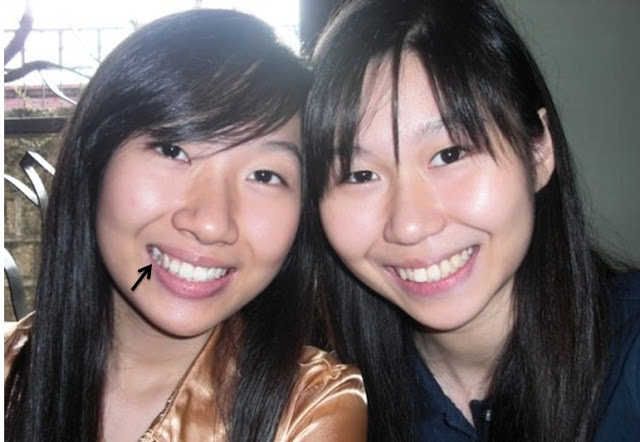
    A lot of people don’t notice but I really have an imperfect set of teeth, sadly. The problem is not overcrowding, a serious overbite, or having wide spaces that make my teeth appear like they are enemies. It’s just that my first and second premolars on the right are like hiding at the back of my canine. They grew at an odd angle.

    The flaw is so evident especially when I smile with all teeth flashing out. (Don’t you agree?) I get bothered by this every time I look at myself in the mirror and on pictures.

    I also have crooked lower incisors that are shaped like a ‘V’ or a ‘butterfly,’ as dentists call it. This one is less prominent though, because I can hide it when I smile or when I talk.

    I waited for years until I get the perfect timing. I thought I’d have massive headaches and toothache when I have dental braces on. I could not compromise on having an irksome feeling while I had to keep my fitness to concentrate on my studies as a student. Also, I would not have the time to visit the dentist’s clinic for regular monthly checkups back then. I was too busy.

    A year and a month after college graduation, I had my two left (upper and lower) impacted teeth pulled out. They were not hurting, but my dentist advised to pull them out else my other teeth will be pushed and they will become an eyesore after some time.

    And just last March, the remaining two right (upper and lower) last molars were also taken out as well. This was already in preparation of the application of braces on my teeth.

    * Deep breaths *

    That time, I just came back from Singapore. I still had not applied for jobs in Manila, so I spent the [vacation] time for healing after the surgery.

    When the wounds were completely healed, I managed to secure a consultation in the orthodontic clinic. To avoid the wait list, Mom and my sister went with me to our dentist-of-all-times. He offered a good price so I could not refuse anymore.

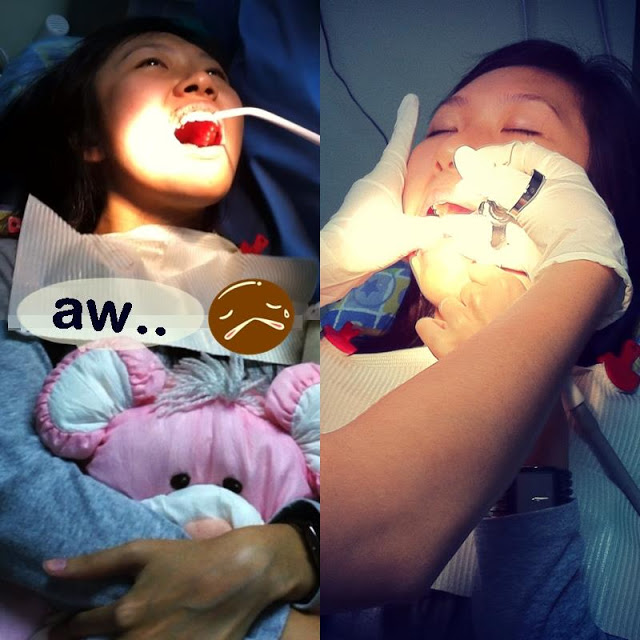
    I knew definitely that having orthodontic braces will be painful at the start. But I made the leap to fill my mouth with metal. The day was May 28, 2012.

    Every last week of the month, I am scheduled to have the rubber wires adjusted for tightening. After every adjustment, I would take photos of my teeth only to see if there’s any improvement. I’m really in close anticipation that they will move as I wish them to.

    Of Braces and Discomfort

    The most difficult part is eating. I had become too conscious when I know I have bits of food stuck on my braces with each bite. It’s also rather impossible to chew on crackers, an apple and other hard and rubbery solid food. During the initial two weeks, I only ate soft food to avoid pressure on my teeth. I’m lucky to have my Mom who cooked me delicious soups, porridge, mashed potatoes and vegetables and bought me jelly, yogurt, ice cream, etc.

    Second hardest is talking. The top part of the buccal tubes has small “antennae” that would often touch with the inside of my lips. When irritated, they hurt like crazy. I thought the feeling would remain that way and felt glad that it didn’t. I had experienced bleeding gums, oh yes. My dentist was just kind enough to spare me a small box of wax for free to put on the affected dental tubes.

    The wax gave me much comfort. However, I wouldn’t want people in public to see me with wax on my teeth. They may think of it as some off-white dirt clinging on my fangs. It’s funny now when I realized that I wore wax during my job interviews.

    To reduce the swelling, another good practice I followed was cold compress and swallowing of ice.

    Smiles Change Lives

    Braces create not only nicer smiles to cameras and crushes but also contribute greatly to oral health. Straight teeth are more than just for attraction; straight, aligned teeth can make it easier to chew food and can reduce my insecurity about my appearance a big step down the line.

    I expect that these braces will be removed in the third quarter of 2013. *crossed fingers here* For now, they may not look the prettiest or the least conspicuous, but I hope that the result will be worth the effort and patience!

    Next update: Orthodontic Treatment and Braces are Worthwhile? – My Thoughts

  • Slimming Treatment at Marie France Bodyline (Part 2)

    Slimming Treatment at Marie France Bodyline (Part 2)

    I had shared my experience with Marie France slimming treatments back in October 29, 2011 when I was in Singapore. Since then, organic searches landing on my post to date came up to 695. Whoa. I was surprised to find out that there’s this much people searching for testimonies about Marie France.

    Keywords they use tell me that people are interested with how much the treatments of Marie France are along with testimonies of their slimming treatments and packages.

    But I think the most critical question to ask here is “How effective are they?”

    From forum discussions, I picked up that there are tremendously many negative comments written about MF. Personally, I wanted to try their service; that’s why I acquired a few and asked some scientific backgrounds on their quick-fix treatments.

    Nothing technical or logical was explained thoroughly ~ but the steps of their procedures. MF is fond of using cold body wraps and electronic machines that will massage your “fatty” body parts until they perspire.

    Because of the dehydration, your body part will appear thinner. In your mind, you’ll think that you have accomplished something ideal because of the sweat (that you won’t produce sans exercise). Before you know it, the “fatty” body parts will just balloon back to the original.

    Contrary to what their friendly staffs are saying, losing 1 cm in a body wrap session is impossible. In reality, you have to purchase about dozens of sessions, and these will have to continue for years. Their packages will be addicting, and you will be more encouraged to extend the plan with their promotional offers.

    Price range of their packages goes around PHp 20,000 to PHp 300,000. So if you’re eyeing on any of their shining-shimmering-splendid options, be prepared to shell out this amount of cash. Consultations, advice and some trial sessions are for free though, to welcome you to the party.

    Marie France’s treatments must be somehow effective, else their business won’t be running for years in the industry. Or maybe, they have the best known and implemented strategy which is to hire the best marketers and train them effectively to pull off the best sales pitches in convincing people to attend to their services.

    As mentioned before, nothing beats good exercise and diet. The human body burns calories from within. This means that we burn calories in the form of fat via adrenaline and not by having complicated machines and slimming gels activate our sweat glands.

    Despite all these said, if you’re like me who’s an adventurer and still would want to try MF, no one can stop you.

    Be a bold witness and write your own commentary.

    Expect one good thing: Like spa treatments, MF treatments are relaxing. Theirs can be a diversion from the monotonous drone of daily chores, a way out of the hustle and bustle of everyday life, an oasis in a desert of tedious work.